Defining those Responsible Using Lanes
Insert lanes in a process to model those responsible.
Inserting a First Lane in a BPMN Process
Lanes structure a process into various swimlanes.
All of a process' lanes are contained within so-called lane sets A lane set is automatically created with each new BPMN process. New lanes are automatically inserted in this lane set.
Lanes can be linked with organizational units to model the state of the respective organizational unit for the process step contained in the lane. Lanes cannot be linked with actors from use case diagrams as standard. This is because they are always outside of the system being viewed in accordance with the UML systematic, meaning they cannot be part of a process. This restriction can be changed in the model configuration.
Lanes always need to take up the full width of a BPMN process when modeling horizontally. This is why it is not possible to change the width in Innovator directly and the width is always adjusted to fit the process. The height of the process can be changed. This automatically adjusts the height of the surrounding processes.
This also applies to changed directions for vertical modeling.
- Select the Lane element from the Create Diagram Content gallery.
- Drag the element from the element and drop it on a free spot in the BPMN process.
The lane is inserted and automatically encompasses the entire process.
Inserting Other Lanes in a BPMN Process
You can model multiple lanes next to each other. However, it is also possible to hierarchically nest lanes. When inserting further lanes it therefore depends where you want to place them. The following describes how to proceed for horizontal modeling. Vertical modeling is carried out in the same way.
- Drag a lane from the Create Diagram Content gallery into the BPMN diagram and move the mouse over an existing lane.
Various insertion points (arrow points) are shown on the lane.
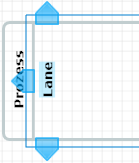
- Let go of the mouse where you want the new lane to be inserted:
- Drop it on the arrow pointing up to insert the new lane above the existing one
- Drop it on the arrow pointing down to insert the new lane below the existing one
- Drop it on the arrow pointing left to insert the new lane so that the existing lane is hierarchically nested within it
- Drop it within an existing lane to insert the new lane so that it is hierarchically nested within the existing lane
Moving Lanes
- Move lanes already inserted within a lane set by using the blue arrow points to drag the lane to another lane or within another lane.
Hiding Lanes in Referencing Process Views
You are in a referencing process view.
You can hide all lanes in a referencing process view.You can use the Show all details context menu item to show lanes.
- Select Hide Lanes in the context menu.
All lanes of the referencing view are hidden.
 Related Topics